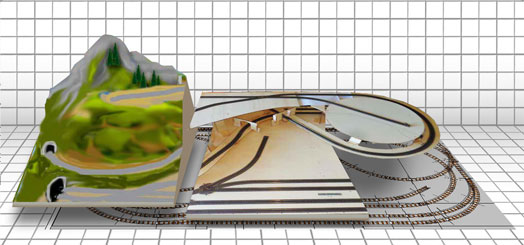
Track plan and scenery: how they are conceived
To begin with, it is necessary to design the track plan, which will influence the construction of the framework structure first and the resulting scenery later.
To draw the track plan, a sheet of grid paper and a pencil are enough, or you can use one of the software programs found on the web, some of which already have pre-loaded track libraries featuring Piko, Fleischmann, Roco, etc….
Since space is limited, we will probably create track overlaps, climbs, and descents, and therefore careful planning is required (which we will change 100 times before making up our minds….).
If you visit the relevant sections of our SHOP, you will find several track plans and layouts that, for historical, technical, and commercial reasons, were originally created for specific brands but can then also be adapted to other track brands.
Recommended H0 SCALE
Fleischmann Profi Track Plans
Roco Line Track Plans
Recommended N SCALE
Fleischmann Piccolo Track Plans

Verifica il prezzo su Amazon e Ordina un avvitatore elettrico consigliato.
Starting from the room we have available, we must conceive a track plan / scenery that maximizes our available space (our true limitation).
Usually, on a layout, we wish to recreate landscapes and scenes referring to images we have in our minds, or even certain dreams of ours. By this, we mean that we imagine wanting to recreate a city, a mountain village, a river, a lake, the sea, the countryside, snow, etc. etc…
While it is true that H0 Scale is 1:87, to fit everything in we would need a layout 100 meters wide, corresponding to about 8.7 Kilometers in reality.
Since this is not possible, we must:
- limit ourselves to a selection of scenes / landscapes that are more or less compatible and still look quite realistic even if somewhat scaled down.
- imagine somehow keeping them separated using mountains / various scenic backdrops.
- ensure we do not have a single point of view, but rather multiple distinct viewpoints.
For example, if the layout is U-shaped (along 3 walls of the room), we can arrange it so that there is the sea on one side, the mountain on the opposite side, and the city or hill in the middle. The spectator, approaching the layout, will never see all 3 of these landscapes as a whole, but rather from different points of view, and we will avoid the unrealistic sight of ‘snow’ right next to beach umbrellas!
If the layout is instead in the center of the room, we can imagine the spectator walking around it, seeing the sea overlooked by a hill on one side, while on the other side we will have the snow-covered mountain; with appropriate scenic dividers, we will keep the 2 views separate.
Obviously, we should avoid subjects that are too large and cannot be somewhat reduced in proportions (see below).
Seemingly, the worst scenario is a limited space with the layout placed against a single wall, meaning with a single point of view. In this case, to achieve good results, we must dig deep into our creativity.
If we look at ‘pre-packaged’ layout components by Noch, such as the Noch 81580 preformed layout (160x120cm) or the Noch 80100 “Silvretta” (220×140), both in H0 Scale, we realize how many things can be made to fit into a fairly limited space.